1. Install Dev-C++:
1.1 Download Dev-C++ from here. (I'm using the Beta 5 Version 4.9.8.0).
1.2 Install Dev-C++ (remember the install-directory).
2. Install aspell-dev:
2.1 Download aspell-dev from here. (I'm using Aspell-dev-0-50-3-3).
2.2 Extract aspell-dev-xx.zip (where xx is the version number).
2.3 Go into the aspell-dev-xx directory.
2.4 Copy the include and lib folder into your Dev-C++-directory (If Windows ask you to replace the folder select "Yes, all").
3. Install FLTK:
3.1 Download the fltk-devpack from here (I'm using fltk-1.1.4).
3.2 Double-click on the .devpak-file.
3.3 Click three times on "Next >" and then on "Install >" to install the devpack.
3.4 Click on "Finish"
3.5. Close the "DevC++ Package Manager".
4. Get SPTK:
4.1 Download SPTK from here (I'm using SPTK 2.2 alpha )
4.2 Extract SPTK into any directory (If Windows does not know the filetype, download and install Winrar first, I've tried to extract the files with Winace, but it creates only a blank directory).
4.3 Go into the sptk-x.x\sptk folder (where x.x is the version).
4.4 Rename the file sptk-config.h.win to sptk-config.h.
5. Import sptk-lib into Dev-C++:
5.1 Start Dev-C++.
5.2 Click on "File" -> "Import" -> "Import MS Visual C++ Project".
5.3 Click on "...".
5.4 Select the file sptk-x.x\VC6\SPTKLib.dsp and click on "Open"
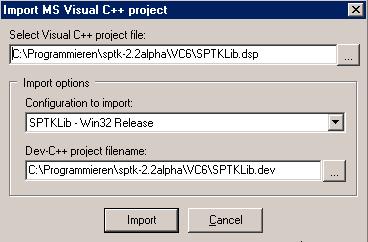
(should look like this)
5.5 Click on "Import".
You get this error now:
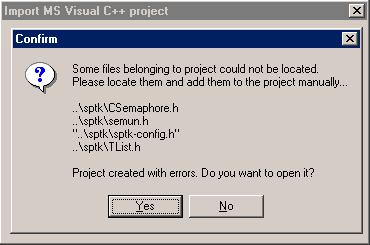
5.6 Ignore it and click on "Yes".
5.7 Right-click on "Headers" and then on "Add to Project".
5.8 Select the file sptk-x.x\sptk\sptk-config.h and click on open.
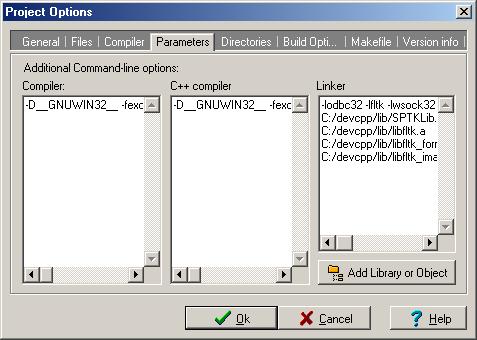
6 Add the FLTK files to SPTKLib.dev:
6.1 Press ALT+P to open the Options Dialog.
6.2 Click on "Parameters".
6.3 Click on "Add Library or Object" under the "Linker"-Textbox.
6.4 Select the file libfltk.a form the devcpp/lib directory.
6.5 Click on "Open".
6.7 Repeat 6.1.4 to 6.1.5 with the files libfltk_forms.a, libfltk_images.a and libfltk_gl.a.
6.8 Click on "OK".
7. Compiler Options
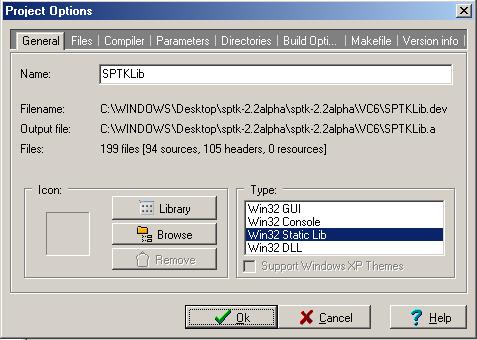
7.1 Make sure you compile a "Static Lib", NOT a "GUI"-Program:
7.2 Press ALT+P to Open the Options Dialog.
7.3 Select "Win32 Static Lib" in the Type-Section.
7.4 Click on "OK"
8. Compile SPTK:
8.1 Press CTRL+F9.
8.2 Wait... ;)
8.3 If you get the following error:
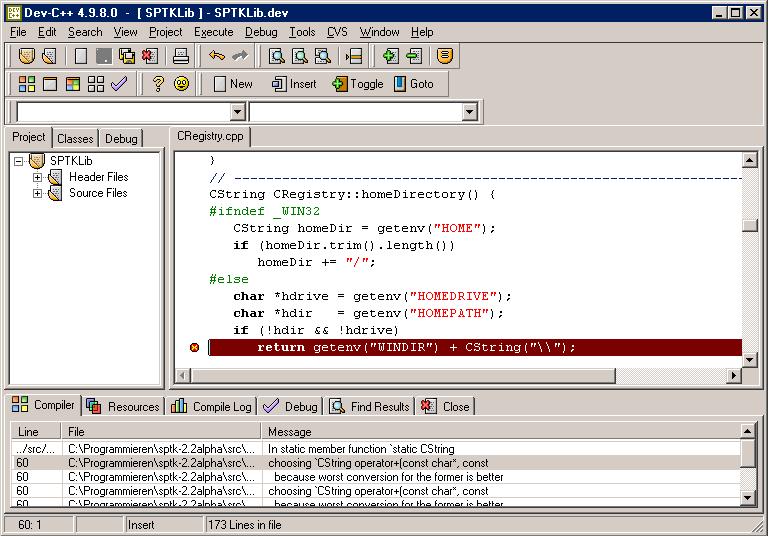
change line 60 in the CRegister.cpp form
return getenv("WINDIR") + CString("\\");
to
return (CString) getenv("WINDIR") + CString("\\");
and press CTRL+F9 again.
If you get another error press CTRL+F9 again
If you see this:

you are successful ;-)
8.4 Now click on "Close".
8.5 Copy the SPTKlib.a from sptk-xx\VC6\ directory into your devcpp\lib directory.
9. Compile your first sptk-program with Dev-C++.
9.1 Start Dev-C++.
9.2 Click on "File" -> "Import" -> "Import MS Visual C++" project.
9.3 Click on "...".
9.4 Select the file sptk-x.x\VC6\cscroll_test.dsp and click on open.
9.5 Click on "Import".
9.6 Click on "Yes"
9.7 Press ALT+P.
9.8 Click on "Parameters".
9.9 Click on "Add Libary or Object" under the "Linker"-Textbox.
9.10 Select the file SPTKlib.a form the devcpp/lib directory.
9.11 Click on "Open".
9.12 Repeat 9.9 to 9.11 with the files libfltk.a, libfltk_forms.a, libfltk_images.a and libfltk_gl.a
(should look like this).
9.13 (tip) Copy the text in the "Linker" Textbox into the memory (right-click -> "copy"). You can now easy paste it into another project without search the files every time, because you need to link these files in every SPTK-Program.
9.14 Click on "OK". You should compile the program now (press F9).